The Farmer Diaries
North Texas farmer seeks orchard salvation with fruity planting
In my effort to opt out of industrialized agriculture and bypass the produce aisle at the grocery store, I've gotten into the habit of eating what's in season and available from my own garden.
On the positive side, I've benefited from fresh produce that's dirt cheap and grown without pesticides or chemical fertilizers. On the negative side, this means I've seldom eaten plums, apples, peaches or pears, because I did not have them in my garden.
I had no problem buying other staples such as wheat or corn, but I avoided fruit. It stemmed from the fact that there used to be several fruit trees on the land where I live — all of which died after I started caring for them. The sight of a plum or pear in my grocery cart would fill me with a sense of loss and defeat.
When selecting trees, I resist the temptation to regard a leafed-out tree as healthy and a bare tree as dead.
But this year, I decided to root out this regret. It was time to reboot my orchard. So I purchased four plum trees in containers.
How to buy
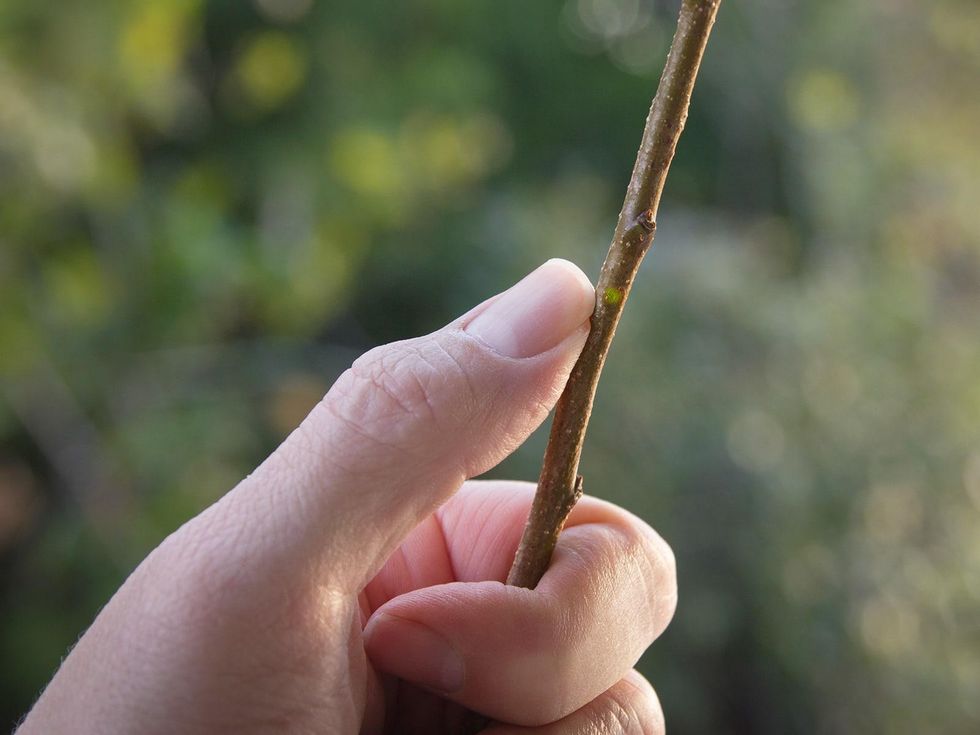
When selecting trees, I resist the temptation to regard a leafed-out tree as healthy and a bare tree as dead. This late in the fall, it's less likely a fruit tree will have leaves anyway. Rather, I look for flexible branches at the top of the tree that have an almost waxy texture and appearance.
Using a technique I picked up from my father, I scratch off a little bark from a branch near the top of the tree. It only takes a spot about the size of Lincoln's head on a penny — a scratch, not a gash. The nick should be easy to make with a fingernail.
If it the outer tissue is too hard to scratch open or if it's brown underneath the outer skin, that portion of the branch is likely dead and will need to be cut off. If all the branches look this way, I won't buy the tree.
In my search, the scratches I made on all the trees revealed a layer of light green plant tissue — perfect. I also avoid trees with roots growing outside the holes at the bottom of their containers. If that's the only choice you have, you can prune the roots.
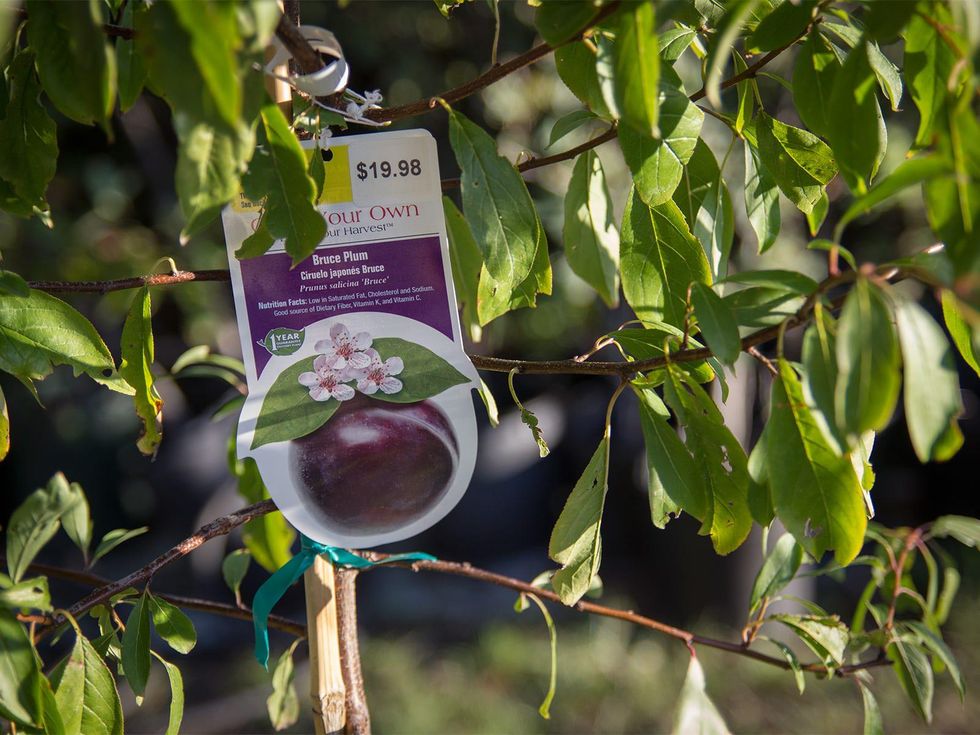
I am far from an expert in trees, so I rely on the tags attached to most nursery stock. Not only do they show the variety, but they also often have tips about the tree, such as a list of companion varieties that will improve the pollination of the one I'm buying.
I bought two Methleys and two Bruce. The Methleys are self-pollinators, but the tags on the Bruce plums indicated that they would be better pollinated when planted with other varieties, including Methley. My bases were covered in buying two of each.
Larger container-grown trees will bear fruit sooner than bare root trees, possibly as soon as two years.
I drive a small car, so trees are not an impulse buy. I borrowed my father's pickup and headed out to the stores where I had lined up my purchases ahead of time. I had only a 10-mile trek, most of which was driven at 30 miles per hour; I laid the trees down in the bed of the truck and did not cover them. For a longer distance or higher speeds, I'd cover the bed with a tarp, because high wind can wreck a tree.
By the time I got home, the sun was about to set. Planting would have to wait, but I watered each tree thoroughly. Even if their leaves have fallen off, container-grown trees must be kept in moist soil because there is no dormancy in trees. In late fall and winter, they may show no noticeable growth above ground, but below the soil, roots are growing and breathing and need adequate moisture.
How to plant
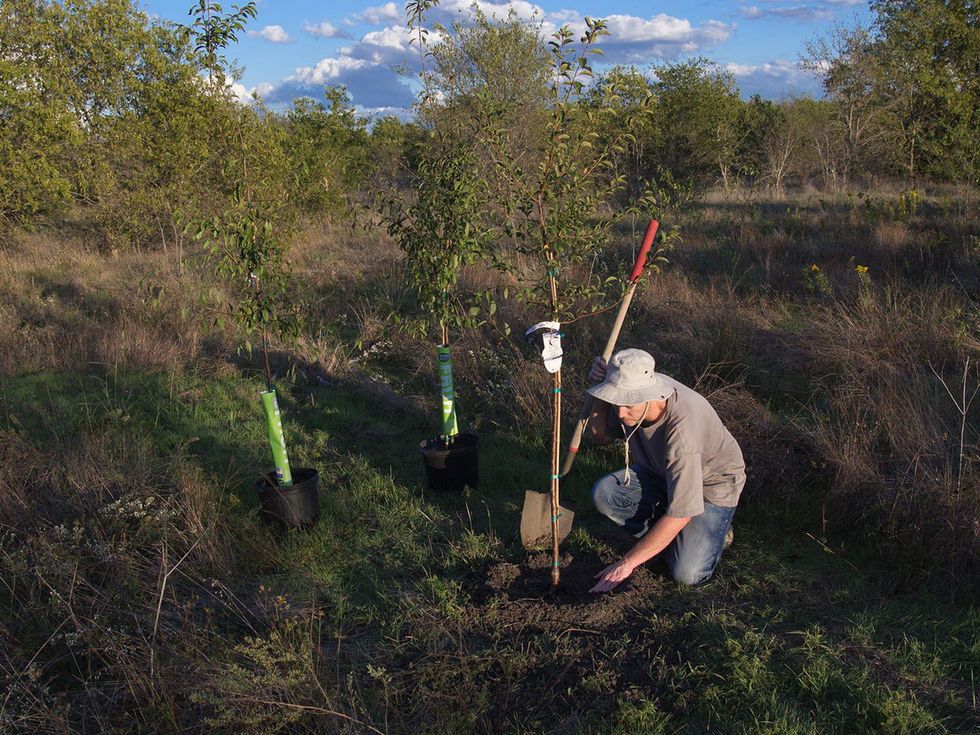
I planted the next day. I enjoy planting trees, as they immediately alter the landscape, adding something tall and interesting to see.
My first step was to find an open area of land with full sunlight, deep soil and good drainage. I decided on a spot where I have been growing "bare root" plum trees for the past few years.
Bare root trees are cuttings that are rooted in a soilless medium. They're cheaper and can be bought online and delivered by mail. But they're also only about a foot high when they arrive, and they take six to 10 years to bear fruit.
The larger container-grown trees will bear fruit sooner than that, possibly as soon as two years.
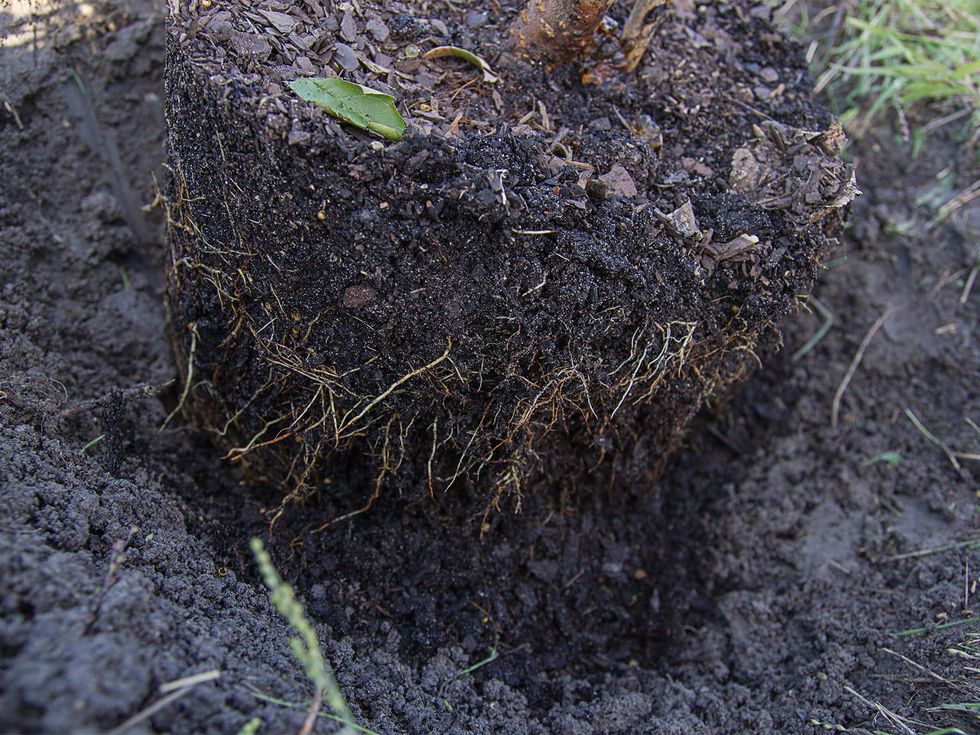
First, I had to dig the hole. My soil condition was ideal: moist but not soggy or sticky. I began by digging a hole that was wide and shallow. I then removed the trees from the container and used the soil packed around the roots — the root ball — to gauge how much deeper to dig.
I enjoy planting trees, as they immediately alter the landscape, adding something tall and interesting to see.
Placing the root ball in the hole, I checked to see if the depth was right. You want the bottom of the tree roots to rest on the bottom of the hole. The top of the root ball should extend aboveground by about an inch.
Once you have the right depth, you fill in the sides of the hole around the roots. After the hole is filled, the root ball resembles a cork stuck in a hole; the top sticks up from the ground.
It's tempting to want to submerge the roots below ground level, but in those conditions, trees rarely thrive and often die. Parking lots built to accommodate old, beautiful trees illustrate this tendency.
The trees slowly suffocate in about five years, even if large openings are left in the concrete around each tree trunk. Tree roots can always grow down into the soil if they're sitting slightly above ground level, and they should not be covered deeper than they naturally grow, either by concrete or soil.
As I filled in the soil around the root ball, I also teased out the roots, so that some were unpacked and could grow out from the trunk, not curled up like they were in their container. As I added soil to fill in the sides of the hole, I tamped it down lightly to make it free of large air pockets.
I do not use compost or any bagged soil products to fill the hole. I only use the soil I've dug out from the hole in the first place. The tree will need to grow in native soil for best results. Creating a barrier between the native soil and the root ball with a dissimilar medium, especially peat moss, will prevent the root ball from wicking moisture from the native soil.
When the hole is filled, planting is finished. With the soil left over, I made a moat around the top of the root ball. That way, when I water the tree, the moat will fill up and allow the water to seep down to the roots.
A light layer of compost, soft rock phosphate and other minerals may be sprinkled over the roots and out a few feet from the trunk to nourish the tree. Organic products are better for trees because they usually take more time to break down, making nutrients available for many years.
Trees seem to do fine without staking or other added support. I'll wait until spring to cover the soil around the root ball with landscape cloth and mulch, to make sure I do not create a winter bog of soggy soil around the new roots. When I do mulch, I'll leave the area above the root ball bare.
The last step is to water the tree thoroughly. Afterward, the soil should be kept moist but not saturated. Rainfall in fall and winter is usually adequate. If a few weeks pass without rain, I'll poke my finger into the upturned soil and make sure it feels moist and pliable, not dry and coarse.
For the first few years, frequent watering in the summer or whenever rainfall is parse will be necessary. Eventually, the tree will become established and better able to endure the hardships of summer with less attention.
With my new grove in place, I feel liberated. I still intend to plant apples and pears. Knowing I have a plan underway that may someday reap fresh fruit helps me overcome my sense of defeat.
